Activities on fibers
Created:
2020-04-14
Last updated: 2024-01-05
Last updated: 2024-01-05
Post view count: 222
Closure view
It’s the most important view, where we perform activities on fibers, plan splices and display fiber connections. Here you can download all documents of made and planned splices as well as diagrams of fiber splice schematics.
Display of cable and optical fibers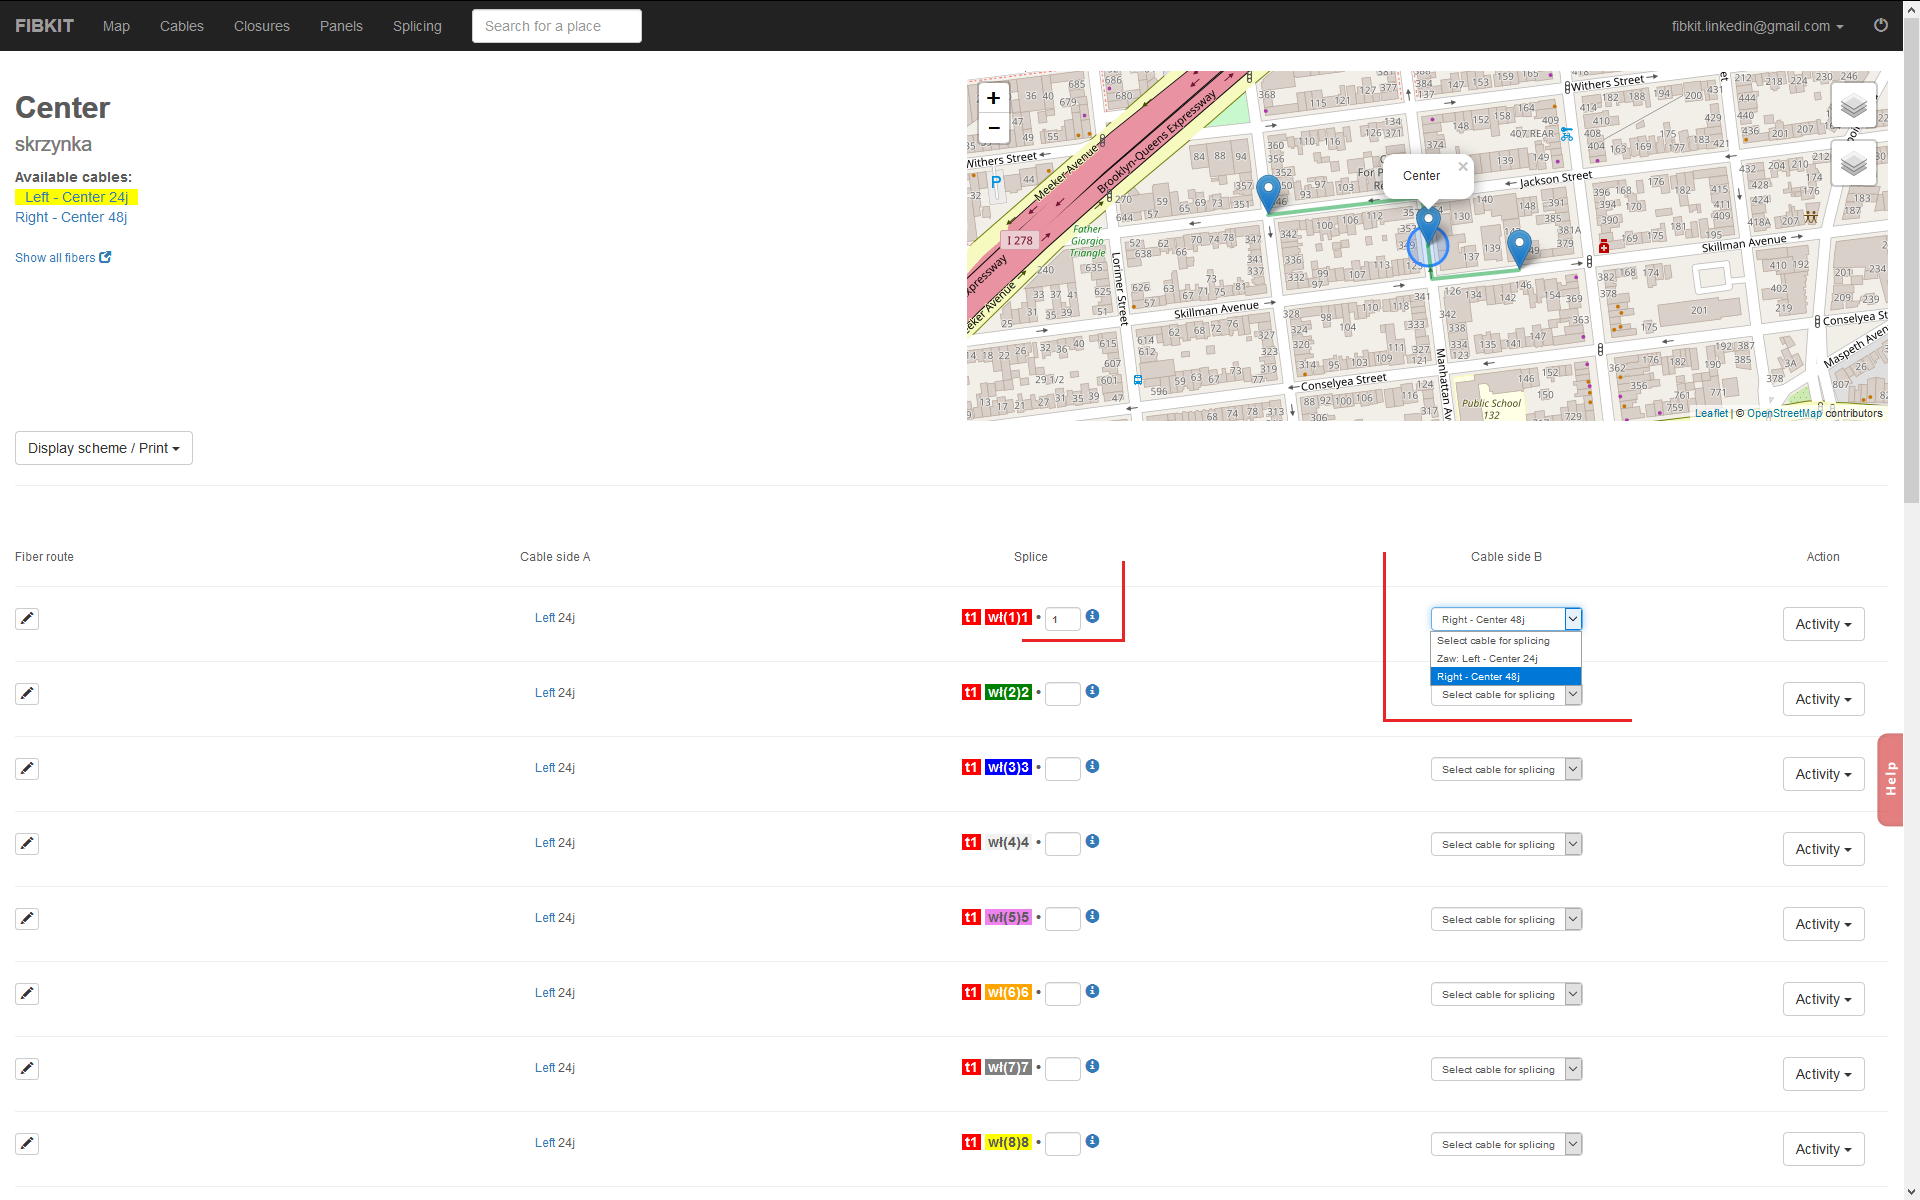
Activities on fibers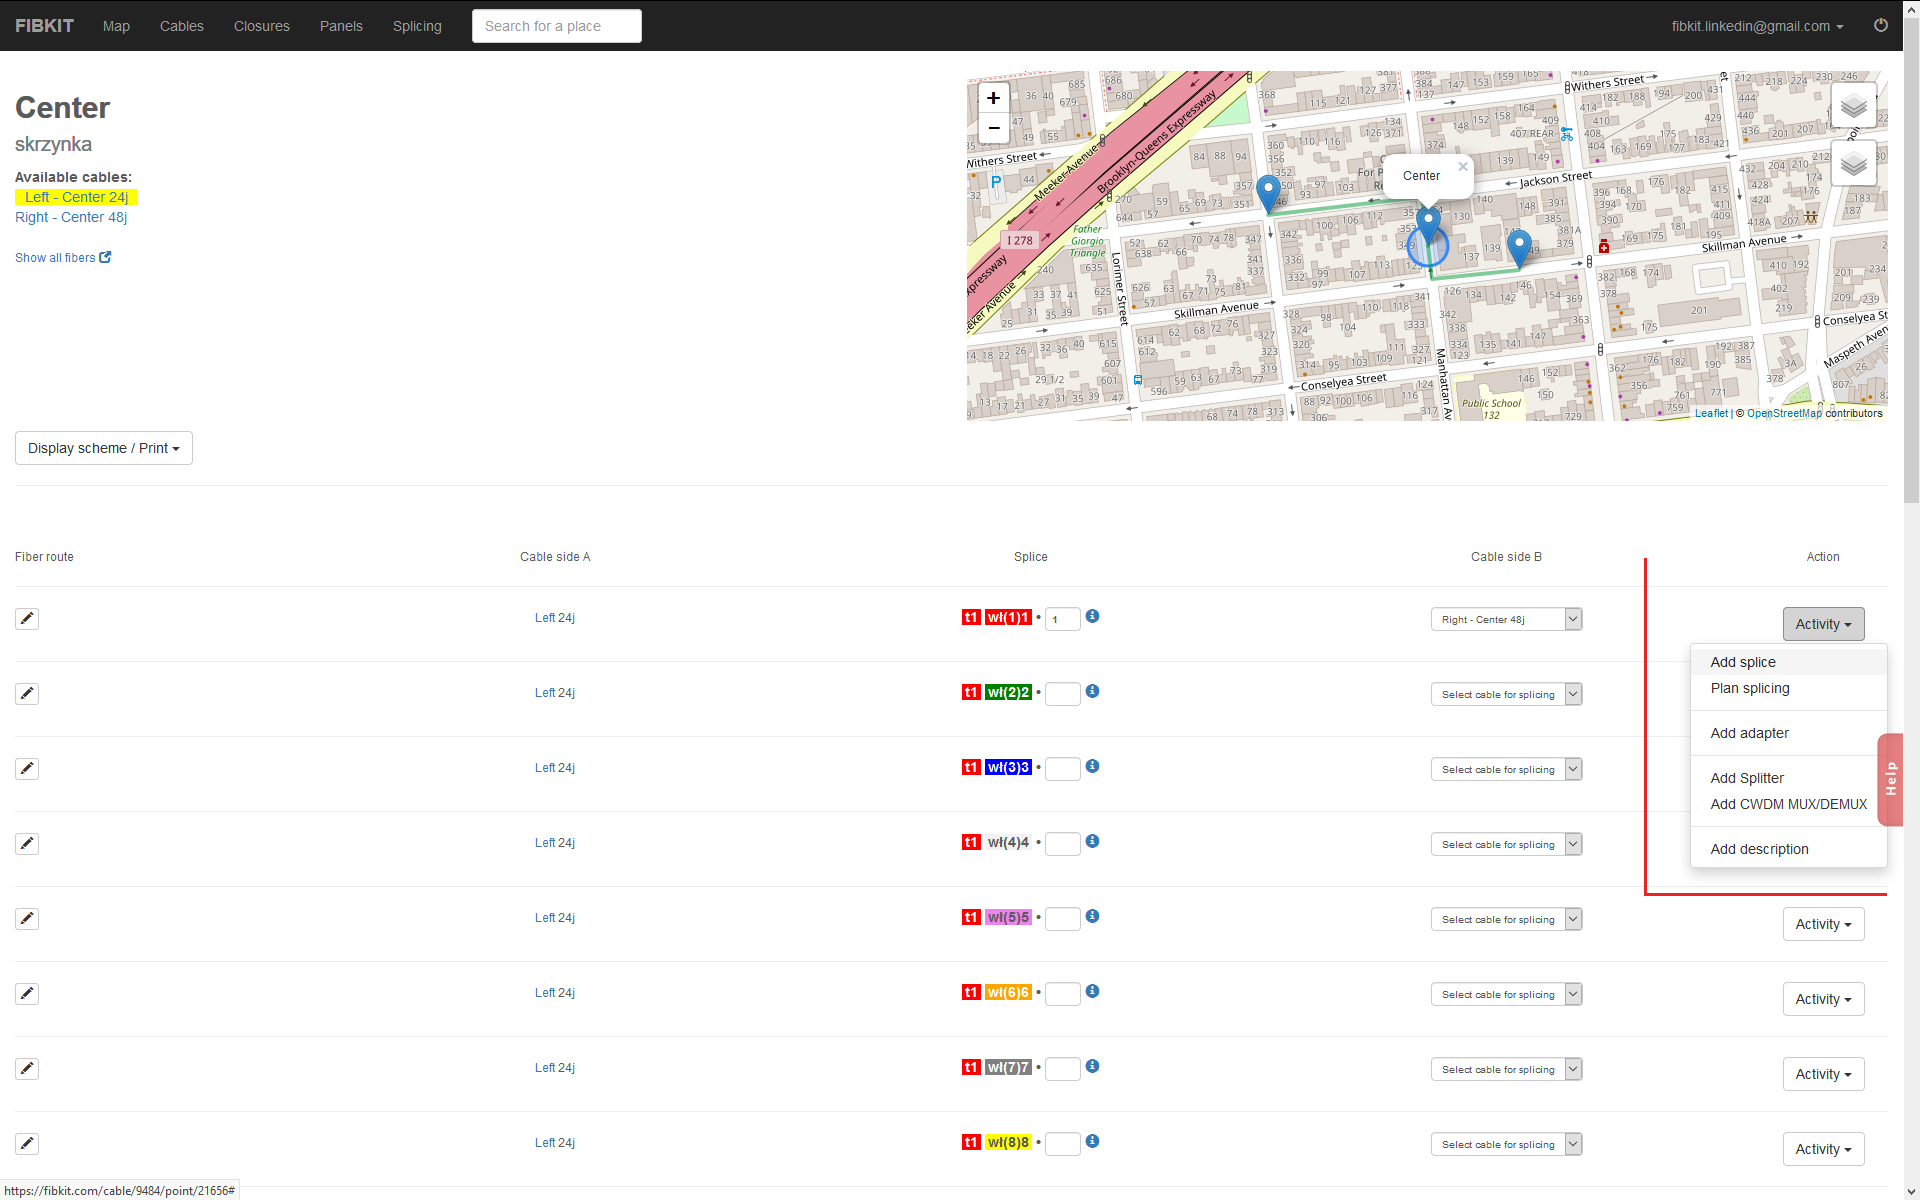
It’s the most important view, where we perform activities on fibers, plan splices and display fiber connections. Here you can download all documents of made and planned splices as well as diagrams of fiber splice schematics.
Display of cable and optical fibers
- Open the Closure view on the black bar and search from the list of available closures for which you want to view the fibers.
- Another way to view the closure is to find this location on the map and click on a spot on the map.
- On the left side of the screen there is a list of available closures. Select the cable.
- All fibers from this cable will be viewed below.
Activities on fibers
- Add splices - connecting fibers includes entering the fiber number in the text box and selecting the cable to be connected from the list. NOTE: in the "Select cable to connect" list there is Return:with cable name. It is a return feature, which means the possibility to splice different fibers from the same cable.
- Select for splicing - planning the fiber splices. Planned connections are underlined in red and displayed in the special Splicing view. Connecting with the Planned status requires confirmation or rejection.
- Add Joint – it’s used to create a connection through the joint interface, eg SC / APC. After clicking the configuration, a window will appear where you should select the type of joint and enter the number of port.
- Add Splitter - this function adds GPON Splitter to the fiber ending. After clicking, the Splitter configuration a window will appear. The splitter can be spliced with an inlet connector and / or an outlet connector. If you don’t select the type of joint, then it will be spliced automatically. After creating the splitter you will be able to add connections to each splitter part.
- Add CWDM MUX / DEMUX – it opens a new window with the configuration of the CWDM MUX / DEMUX Filter. In the text box enter the wave length at which the CWDM filter will work. This information will be displayed next to the filter. After saving, a filter section will appear to which you can add the fiber connections.
- Add Description – it’s an option to add a short description to the splice, port, joint, splitter, CWDM filter. The description will be displayed below the fiber connection. You can freely change or delete this description.
Back
Add Comment